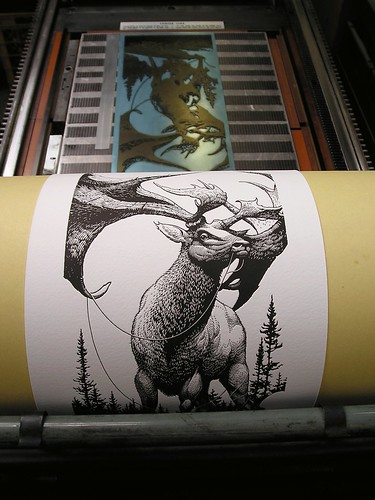
Megaloceros, Aaron Horkey, Dead Arts Publishing, 2010. Printing at The Bieler Press.
Gerald Lange of The Bieler Press printed with the photopolymer plate process since 1991 and provided plates for the contemporary studio letterpress community since 1995. Offered to letterpress printers were professionally processed premium-grade plates for today’s common bases. Information that follows was used by the Press when producing plates.
Photopolymer Plate Specifications:
Stocked were the following Toyobo Printight Type K brand plates for use with flatbases. These specific photopolymer plates are state-of-the-art industrial quality and meet the standard letterpress formulated hardness rating of Shore D 67˚. They are manufactured with photosensitive nylon resin, thus they hold sharp detail and fine lines exceptionally well with no loss of imaging during presswork.
• KM95GR—steel-backed at .038" thickness—highly recommended for use on production Vandercooks or Heidelbergs with properly configured magnetic base, e.g., an industry-standard Bunting Magnetic Cerface Flat Base ground to .880" (no interlay required). This was the plate used at The Bieler Press for all of its production (see pic above). It is especially recommended for large format pieces and/or difficult imaging. This plate can also be fitted to a Patmag base (or similar non-industrial economical base with magnetic top sheeting) with appropriate underlay (+/- .022) and interlay [such as 3M’s 75 Spray Adhesive].
• KM152GR—steel-backed at .060" thickness—specifically recommended for use on job platen presses, such as a C&P or Kluge, and smaller platens, where roller height issues may be of concern. The normal configuration for a Patmag base or fitted to a Bunting Magnetic Cerface Flat Base ground to .858".
• KF95GC—polyester-backed at .038" thickness—common configuration for economical non-industrial aluminum flatbases such as the Boxcar Base, the ēlum Eluminum, or others of similar non-magnetic construction. Plates include an attached .004" transparent film adhesive interlay [from BiesSse Tape Solutions]. Requires appropriate underlay if used on any flatbase measuring less than .875" +/-.
Maximum plate size (including required margins, crop marks, or other registration devices) is 16-1/2 by 23-3/8 inches (A2). Plates were furnished with unaligned edges cut approximately 1/4 to 3/8 of an inch (+/-) margin around imaging (if more or less edge border is required client should request this with order and provide adequate room on e-file).
Imaging and Film Negatives:
B/W line art furnished for platemaking must be in the form of high-quality imagesetter generated silver-based film negatives with discernible emulsion side, a resolution of 2400 dpi (highly recommended), and made as RREUs (right reading/emulsion side up). Select EPS or Press Quality PDF when submitting e-files to your film processor. For difficult imaging requiring dot patterns, such as photographs or tonal backgrounds, please inquire.
If the client requires multiple plates cut from negatives, imaging should be separated by a minimum of 3/4 of an inch and aligned for linear cuttings in either direction. Cutting schematic should be emailed via PDF or enclosed with a film negative. In all cases, to avoid problems please leave at least half an inch margin at outside edges of the film negative.
Negatives and all other materials are returned to the client with plates. Negatives are trimmed to facilitate platemaking.
Bieler Press Photopolymer Platemaking Service
Bunting Magnetic Cerface Flat Bases
The Bieler Press is a manufacturing representative and distributor (since 1998) of the industry-standard Bunting Magnetic Cerface™ Flat Base for Bunting Magnetics Co.
Industry designed, this is the most exacting flatbase available for the professional letterpress printer. Housed in an aluminum shell, the powerful surface-mounted ceramic magnets hold steel-backed photopolymer plates or steel dies securely in register—without the need for interlay film or spray adhesives—and thus provide exacting impression—with no plate travel, stretching, distortion, buckling or bulging, loss of imaging, or adherence problems—throughout the most demanding of print runs.
Each base is ground to the client’s plate thickness requirements and its magnetism is guaranteed for life. These are precision ground, held to tolerance between .000" and .001", and are parallel across the measure. Thus, multiple bases can be locked together without concern for variance (for precision, Bunting does recommend combination bases rather than going to a larger size base).
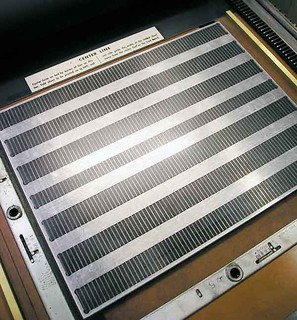
Bunting flatbases are manufactured in a number of standard sizes configured for the various size chases of all letterpress production presses, including Heidelberg, Kluge, Chandler & Price, and Miehle. Shown here is a MB-811 (8-1/2 by 11-1/4 inch) Bunting Magnetic Cerface Flat Base (their largest standard size — and cheapest per square inch!) locked up in the bed of a Vandercook SP15—a 15-inch bed wide Vandercook will accommodate two bases at this size, a 20-inch bed wide Vandercook four bases at this size. Custom sizes are available up to 19 by 39 inches.
Bunting Magnetics was founded in 1959 and has manufactured its highly regarded magnetic bases since 1985. The Cerface model (introduced in 1994) is the most recent configuration of its flatbases.
Note: These flatbases are also available ground for use on galley proof presses that otherwise require an additional bedplate and other presses with non-standard type height requirements, such as foreign-made presses.
Printing digital type on the hand-operated flatbed cylinder press
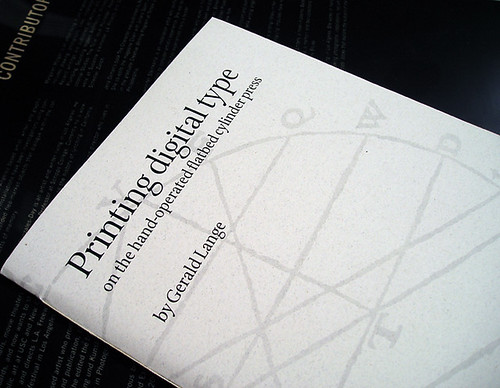
First published in 1998, Printing digital type on the hand-operated flatbed cylinder press was written by Gerald Lange and provided a wealth of detailed information on letterpress printing of photopolymer plates with proof presses such as the Vandercook. Published in several editions by The Bieler Press, it is still considered the definitive manual on the process. A fifth edition is available from Chatwin Books, Seattle.
Subjects covered in previous versions were digital type and letterpress configuration (including font modification sequences for FontLab Studio and Fontographer); film negatives and imaging; photopolymer plates, flatbases, and platemaking equipment; the photopolymer platemaking process—preparation, exposure, washout, drying, curing; base lockup and press preparation; plate registration and travel; flatbed cylinder press presswork: impression, cylinder packing and makeready, rollers and inking; with additional notes on prepress cautions and considerations, press operation and maintenance, ink and paper, photopolymer plates and letterpress printing, and storage and care of photopolymer plates.
Selected Reviews (first four editions):
Printing digital type on the hand-operated flatbed cylinder press could not come out at a more appropriate time. . . . With his years of experience in type, printing and fine press publishing, Mr Lange brings both respect and credibility to the subject of digital type and fine press printing. —Wilber H. Schilling, Parenthesis: The Journal of the Fine Press Book Association
A masterpiece of concision. . . [Printing digital type on the hand-operated flatbed cylinder press] is well worth reading, not just for what it is, a technical guide to the process, but also as a masterpiece of the equally difficult art of describing a technical process in a few clear words. —Nicolas Barker, The Book Collector
Lange’s understanding of the way type design and printing processes are related is impressive, as is the [monograph’s] breadth of reference. —Andy Crewdson, Lines and splines
Gerald Lange is considered by many to be the leading teacher of letterpress printing in America. In this book he brings to digital type the old-world traditions of letterpress printing. —Phil Bevis, Arundel Antiquarian Books
If you care about the quality of your polymer plates, Gerald Lange’s classic book [Printing digital type on the hand-operated flatbed cylinder press] is mandatory reading. This is the book about polymer plates for letterpress. —Harold Kyle, Boxcar Press
This is one of the few letterpress manuals currently in print, and the only one specifically addressing both Vandercook proof presses (the gold standard for current fine letterpress printers) and photopolymer plates. This book is the authority on the technologies of “modern” limited edition letterpress printing. —David S. Rose, “Introduction to Letterpress Printing in the 21st Century.”
A short, self-published, but extremely thorough monograph on letterpress printing using photopolymer plates on, basically, Vandercook printing presses. Lange covers all one would want to know about this radical “new” process, as well as giving some pointers on adjusting computer typefaces for optimal letterpress printing. —Katherine Bridges, A. Edward Newton Student Book Collection Competition winner, 2005
The leading spokesman for this process is the California printer and typographer Gerald Lange. His seminal Printing digital type on the hand-operated flatbed cylinder press offers the benefit of his extensive interrogation of the process. —Steve Rigley, Eye: The International Review of Graphic Design
This book is “must read” if you are printing with photopolymer or have any interest in making polymer plates yourself. Gerald Lange is a pioneer in photopolymer use for letterpress and has a wealth of knowledge on the subject. —Bradley Foster, Elūm Designs
Printing digital type on the hand-operated flatbed cylinder press. . . is well written and informative. I particularly appreciate that you give clear explanations for why what you present works—the meta level that gets us beyond dogma and facilitates independent thinking. —Jonathan Antonio Edelman, Product Realization Lab, Department of Mechanical Engineering, Stanford University
The title says it all. THE book on the finer points of using photo-polymer plates in the printing process. Gerald Lange is a charismatic and learned teacher and one of the country’s finest letterpress practitioners. Gerald is also a very capable and gifted writer who has a rare gift of making technical processes understandable. —D B Brewster, LibraryThing
A few copies of each edition of publisher’s archival copies are still available from The Bieler Press. These are “as new” collectors’ copies (signed by the author upon request). Contact: gerald.bielerpr.lange@gmail.com
1st edition, first printing, 1998. $74.95
1st edition, second printing (with revisions), 1999. $74.95
2nd edition, 2001. $79.95
3rd edition, 2004. $79.95
4th edition, 2009. $89.95
PPLetterpress

Photo courtesy Farida Sunada.
Founded by Gerald Lange in 2001, PPLetterpress was a community forum on contemporary studio-letterpress and letterpress-related typography. While the subject focus was on printing with digital type and the photopolymer plate process, the group site also encompassed related investigative and exploratory printing and typographic techniques, as well as historical and contemporary letterpress practices and concerns.
PPLetterpress served as both a discussion list and reference site with online resources on type and typography, experimental and traditional printing, and allied interests. It ended with the closure of Yahoo Groups in late 2019.
Photopolymer plate cleaning and plate longevity
Solvents/inks that have been indicated as detrimental to photopolymer plate health and longevity are those containing acetates. Plate washes formulated specifically for photopolymer plates are best, but are increasingly hard to find. Most of the plate washes that I have used, such as Anchor's Aled, are no longer on the market. Like type washes, plate washes are fast drying to prevent the solvent from remaining in the relief of the plate and contaminating the ink film.
A particular concern with photopolymer plates is cleaning during a pressrun. Ink runoff and debris, such as paper dust and rag fiber, can accumulate in the relief area of photopolymer plates, which, unlike metal type or metal plates, is tacky and will retain these materials. They will attract further ink into the relief areas and eventually come into contact with the surface film, causing your imaging to become fuzzy or blurry. This aggregate of material is quite difficult to successfully remove. If your plate processor supplies proofs along with your plate, you may notice the relief is already contaminated with lint and residue ink from the cleaning process.
Some solutions: Inexpensive fast dryers like 100% Isopropyl Alcohol (printer’s alcohol) or Coleman Lantern Fuel (white gas) work well as substitute plate washes if used in moderation. Note: these are highly flammable and need special storage containers. There are special lint free tight-weave cloths on the market (medical, aerospace) that I suggest for cleaning plates. A photopolymer plate brush or a soft toothbrush, such as those used for gum health, as well as a spray of compressed air, will help quite a bit in keeping the relief area clean.
In regard to storage, mainly keep the plates away from light and heat as well as ozone, the primary cause of plate deterioration. Ozone is generated by electrical motors, lighting, etc. It is also more common in the local atmosphere during the summer months. Combined with high temperatures it will deteriorate the plates quickly, and in severe conditions, cause cracking or splintering. It is not uncommon for polyester-backed plates with significant surface area to curl while in storage. While there is very little that can be done about this as these are the result of natural stresses, placing the affected plate in a tepid bath for a very short period and then drying it out in the oven may serve to relax it, but this technique by itself cannot revitalize the photopolymer.
Used plates should be stored flat in paper envelopes, wrapped in Saran Wrap or black plastic, or sealed in Zip Lock bags (a temporary means to preserve plates is a breathe of air into the plastic bag before closing, ensuring that moisture and carbon dioxide are trapped with the plate). Carbon dioxide baths have been used to preserve and revive plates in photopolymer's earlier years (we have tested this and it is valid) and antiozonants (such as ArmorAll) have preservative qualities, but it is far better to regenerate from the original negatives than to re-use an older plate, as you cannot successfully halt the degenerative process (the printing qualities of a freshly made plate, its tack and resilience, wanes over time). Save your film negatives in envelopes with the emulsion side protected with acetate slips.
Added 12/27/10. Note that recent regulations and changes in film chemistry have greatly reduced the longevity of film negatives. You are now better off preserving your original digital files and converting/translating them to current usage as appropriate.
Brush maintenance and adjustment
The operation of the washout unit of any platemaking machine is a matter of routine. Keep the water level of the bath about a quarter of an inch above the brush, if too low plate surfaces will score. A cup of distilled white vinegar added to the bath will provide a bit of needed acidity and keep mineral deposits from accumulating. After filling the tank and the bristle tufts are saturated, rub them with the flat of your hand to reduce their stiffness.
A minimum amount of care will provide long life to the brush. Degradation to brushes is primarily the result of platen wear pressure due to incorrect brush adjustment, distortion of the tufts, and accumulation of photopolymer debris. Never reheat a saturated bath as debris will adhere to the heating element and harden to the brush unit as well as the inside walls and floor of the tank. Brushes are expensive to replace so daily maintenance pays off.
Empty the bath water at the end of each day to prevent mildew and corrosion. If removable, drain the brush while flushing the bath. Photopolymer residue can accumulate at the floor of the brush and eventually interfere with washout effectiveness by distorting bristle tuft pattern. Spray the tank clean with a high-pressure hose but take care not to spray the bristles or they will tangle and mat. Fill the tank with fresh water and flush again. Clean the sides and bottom with a damp rag. Afterwards, rub the bristles slightly with the flat of your hand to spring the tufts upright. Leave the washout unit open overnight to allow the brush to completely dry out. Some manufacturers suggest never allowing the brush to dry. Defer to your manual.
Replace brush when it begins to fail to completely clean the floor of the photopolymer plate. The incidence of this will increase sporadically but will get progressively worse. Though it is otherwise hard to discern, replacement is forthcoming when the surface of the brush begins to reveal patterns where tufts are no longer retaining their shape. If distorted tufts are partially clinging to photopolymer debris on the brush plate floor, this can be remedied with a paint brush cleaning comb or heavy duty de-tangle dog hair comb (better). Regular use will improve the efficiency of the brush and greatly extend its working life.
To reduce wear on the brush test its surface level to the platen. The least amount of pressure is the correct pressure. On a perfectly leveled machine, a dry platen lowered to the wet brush (with water level reduced below the brush) should just show the markings of the wet tufts. If it is dry or overly wet, adjustment is necessary. The brush is adjustable, generally, simply by turning adjusting screws fitted to the brush frame. Consult your owner’s manual for the correct adjustment for your machine.
Essentially, if the platen is completely wet, lower the brush until the tufts no longer mark (and re-adjust until they do), if completely dry, raise them until they just touch. Compensate in raising or lowering for corners that may remain wet or dry. Tufts should just mark the platen—if only two sides of the platen show markings (parallel either horizontally or vertically) or if only the center area; that is okay. To be safe, turn adjusting screws uniformly only a half-a-turn until correct. Do not overly compensate for corners that may be either dry or wet.
Note that if you are routinely processing significantly different thicknesses of plate material or use a detachable PVC carrier sheet, the brush should be adjusted to compensate. If this is the case, it will pay to work out a procedure involving shims that can be easily inserted and removed.
Custom plate processing: Sliding of hairline rule and embellishments
Dependent upon the configuration of the imaging (usually raylike or circular patterns), sometimes distortion of hairline rule and similar extremely thin font or image embellishments can be corrected with increased exposure and less washout. This is the normal procedure. If, however, even after correction, the washout reveals the imaging to be stable but after oven drying it is distorted, the drying out process is the culprit. Imaging with minimal relief structure can actually slide out of position because of the contracting nature of the heat and the slippery wet pre-exposed photopolymer floor of the plate. Note that manufacturers back expose sheet photopolymer plate material before attaching to the backing, thus the floor is insoluble and is a plane of demarcation.
This problem, which I have only noticed on plastic-backed plates, is often easily cured. After the normal procedure of spraying and sponge drying the plate, try blowing the moisture off with a can of compressed air until the floor appears to be clear of water droplets. Put the plate in the dryer but check on it every couple of minutes or so. Amazingly, this can often solve the problem. Note again though that a complex imaging configuration may not allow for this quick fix.
On scales and lamps
A 21-step gray scale (from Dainippon or Stouffer) is used to determine exposure rates (most plate manufacturers supply an information sheet providing the correct step when exposing their plates). The scale is used to test lamp intensity, which should be undertaken periodically. Over time, lamps will degenerate and should be replaced (at approximately 750 to 1,000 usage hours.). If not, exposure consistency will wane with the consequence that plates are no longer able to hold fine detail. To compensate, exposure times need to be increased.
The scale is processed similar to that of a film negative. Process the plate as per your usual practice. The exposure rate should be your normal rate for when processing type. Other rates of exposure, such as those for solids and halftones, are determined correctly with the scale as well. Note that for accurate readings, plate material should be brought to room temperature and the lamps should be warm from previous exposure.
When processing is completed the plate will show step levels of gray. Some of the gray levels will have washed out and others will not have. One or two of the steps between the solid and washed out steps may exhibit slight surface corruption. The first step that does not show corruption indicates the exposure intensity of the lamps. Manufacturers have slightly different specifications for determining correct exposure. Toyobo, the manufacturer of the Printight plate, recommends a solid 14–15 for a .038" thickness plate and 15–16 for a .060" on the Stouffer scale. Other manufacturers have slightly different specifications. If the reading is lower than the recommended reading, it may be time to consider replacing the lamps as they have reached the end of their useful life.
Replacement lamps need to meet the manufacturer’s specifications for your machine. For consistent exposure, it is recommended that all lamps be replaced at the same time. Before replacing your lamps, you should inspect the lighting quality of the existent lamps. Pull the lamp drawer out, turn on the machine, and set the exposing timer for a short duration. Wear eye protection when viewing lamps under exposure. If a lamp is flashing (at start up or shut down), is slow to start, or inoperable, note its numerical position on the drawer, as there is usually an electrical problem not necessarily the lamp that is causing this problem.
Shut the machine off and disconnect the electrical cord. Pull the drawer out, either entirely or just as far as you need to. Remove all the lamps before installing the new lamps. The old lamps should not exhibit arching at the pins or oddities in coloration such as darkening at only one end of a lamp; an indication of a problem in circuitry (which will also shorten the life of the ballast). Gray or brownish bands near both ends of the lamp, however, is normal with lamp aging. Circuitry problems are usually the result of a poor connection either between the lamp pins and the lamp holder contacts, or between the ballast leads and the lamp holder terminals.
Some ultraviolet discharge lamps have a reflector side. This coated side should face down (to the vacuum table). When inserting the lamp make sure the direction of the bi-pin is correct. There are positioning guides (an embossed mark on the metal end cap) that will guide you. The lamp is turned 90 degrees and locked in place. Note the bi-pins must be secure and exactly parallel in the lamp holders. The positioning guide will help you discern if the lamps are correctly locked in place. It should be in the exact center position.
Check the lamps by reconnecting the electrics, starting the machine, and running a short exposure (with the lamp drawer open). If one or more of the lamps is not illuminated, note its position on the drawer and shut the machine off, disconnect the electrics and begin inspecting the connections. You can determine if a lamp is defective by switching its position with another lamp. This will tell you if it is the connections rather than the lamp itself that is the culprit.
Usually the problem is merely a loose connection to a lamp holder, especially if it is a quick-wire or pressure lock terminal rather than a screw terminal. The latter two are easily fixed simply through adjustment. Quick-wire terminals may pull loose when changing out the lamps so you will have to push on each of them to make sure they click back in place.
If the terminals check out okay, the wiring is otherwise correct, and you still have a problem with a non-functioning lamp, the ballast connected to this lamp position may be faulty and need to be replaced. If your platemaker is an older model and you are experiencing continual ballast failure, your ballasts are reaching the end of their life cycle and you should replace them all.
Subscribe to:
Posts (Atom)